随手乱记
一、代码块行高亮
- vitepress 的代码块行颜色差异:
在某一行添加 // [!code --] 或 // [!code ++] 注释将会为该行创建 diff,同时保留代码块的颜色。
输入:
```js
export default {
data () {
return {
msg: 'Removed'
msg: 'Added'
}
}
}
```输出:
js
```js
export default {
data () {
return {
msg: 'Removed'
msg: 'Added'
}
}
}
```但不一定,比如python的注释符是 # 就要把 // 改成 # ,即# [!code --] 或 # [!code ++]
输入:
js
a=1
b=2 # [!code --]
c=3 # [!code ++]
d=4输出:
python
a=1
b=2
c=3
d=4txt
二、代码块分组
- vitepress 代码组
可以像这样对多个代码块进行分组:
- 输入:
md
::: code-group
```js [config.js]
/**
 * @type {import('vitepress').UserConfig}
 */
const config = {
  // ...
}

export default config
```
```ts [config.ts]
import type { UserConfig } from 'vitepress'

const config: UserConfig = {
  // ...
}

export default config
```
:::- 输出:
js
/**
* @type {import('vitepress').UserConfig}
*/
const config = {
// ...
}
export default configts
import type { UserConfig } from 'vitepress'
const config: UserConfig = {
// ...
}
export default config三、gcd & lcm
c++
int gcd(int a, int b){
    int r;
    while(b != 0){
        r = a % b;
        a = b;
        b = r;
    }
    return a;
}c++
int lcm(int a, int b){
    return abs(a * b) / gcd(a,b);
}四、VitePress 转义 Vue
- 可以通过使用
v-pre指令将它们包裹在<span>或其他元素中来转义Vue插值:
markdown
This <span v-pre>{{ will be displayed as-is }}</span>- 也可以将整个段落包装在
v-pre自定义容器中:
markdown
::: v-pre
{{ This will be displayed as-is }}`
:::- 便携使用(用于复制):
markdown
<span v-pre>{{}}</span>

<span v-pre>`{{}}`</span>五、Vitepress 包含 markdown 文件
- 可以像这样在一个
markdown文件中包含另一个markdown文件,甚至是内嵌的。
markdown
...

<!--@include: ./tlias_2.md-->六、mysql 忘记密码
- 1). 在
Windows的服务里面停掉MySQL80服务
- 2). 找到
my.ini在你电脑上的真实位置,然后代入下面的示例命令:
管理员身份运行
cmd
shell
mysqld --defaults-file="C:\ProgramData\MySQL\MySQL Server 8.0\my.ini" --skip-grant-tables --shared-memory- 3). 另开一个终端:无密码登录
管理员身份运行
cmd
shell
mysql -uroot- 4). 去系统表修改密码:
sql
use mysql刷新权限
sql
FLUSH PRIVILEGES;sql
ALTER USER 'root'@'localhost' IDENTIFIED BY '新密码';- 5). 退出, 重新启动服务,使用新密码登录即可
七、jupyter lab 修改初始路径
- 1). 打开
cmd输入jupyter --config-dir找到配置目录位置(或jupyter lab --generate-config) - 2). 根据输出的这个位置找到对应文件夹,然后打开
jupyter_lab_config.py这个配置文件 - 3). 找到下图对应的地方,删除前面的
#然后填写自己的路径,保存
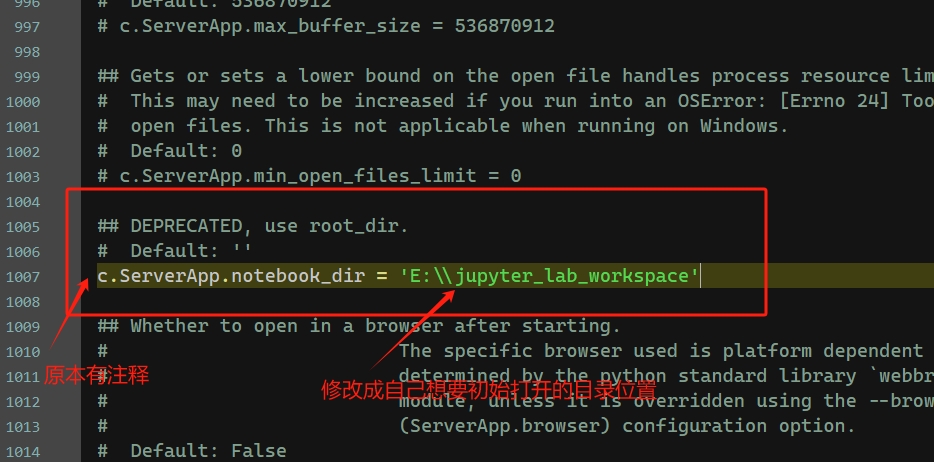
- 保存好后重启
jupyter lab就是设置好的路径位置打开
八、Gemini 登录后无法使用
- 没登录还能对话,登录后反而不能使用了,如下:

- 在地址栏输入:
https://gemini.google.com/gems/create

- 创建成功后就可以正常使用